Android is becoming the major platform for gaming and tons of high-quality games are being developed day by day. And the latest Snapdragon 855+ chipset brings out the whole new level for mobile gaming.
Even though we have powerful chipset like Snapdragon 800 series, there are lots of people out there still can’t afford to buy a higher-end smartphone and some not even had a chance to try Android because they’re using iPhone or whatever.
That’s where the Android Emulators shines, and yeah as ages go by Android Emulators becoming more powerful and consistent. And many of probably may know that Bluestacks is one of the best Android Emulators ever since it’s launch. And now they have some whole new level features and an exclusive gaming mode to play Android games on your PC.
Also Read: Bluestacks Tweaker
Top Bluestacks Features
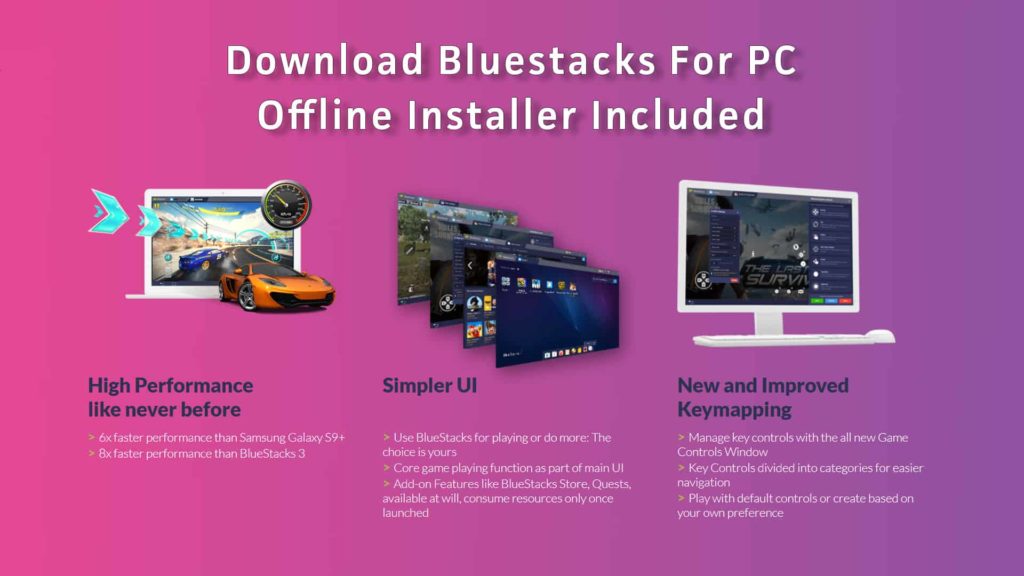
- Simpler, Faster and more Powerful than ever.
- Bluestacks 4 is almost 6 times faster than Samsung Galaxy S9+.
- Pre-built enhanced gaming mode that supports inputs like keyboard and mouse (intuitive keymapping).
- Updated to latest Android N (7.1.2).
- Best way to play Android games on PC at ultra quality.
- Play multiple games side by side using Multi-Windows.
- Just sign in to your Google account and create your virtual higher-end Android device instantly.
Download Bluestacks
There are two ways you can download Bluestacks from,
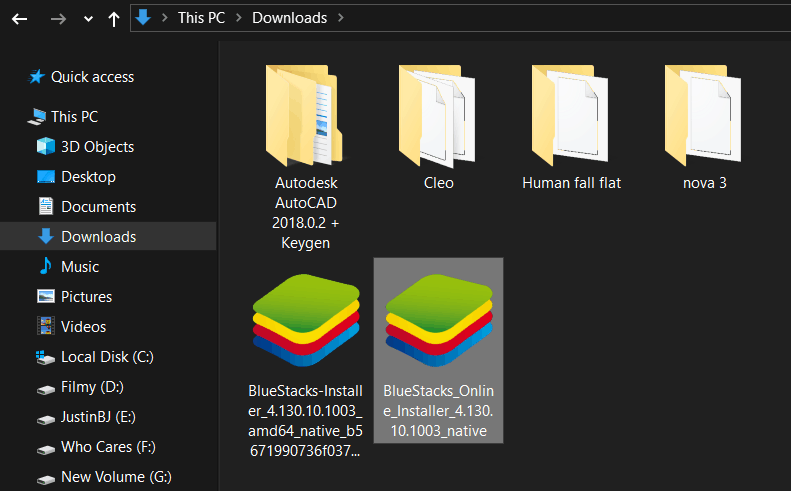
- Online Installer
You can download the latest version of Bluestacks from the official Bluestacks website using the online installer.
Download Bluestacks 4 (Online Installer)
Once you opened this website just click the Download Bluestacks button and it will automatically start downloading it for you. If it doesn’t just feel free to Click here to retry option under the Download Started option.
- Offline Installer
Well, offline installer is best for the people who don’t have faster internet or say like you don’t have the internet on your PC.
Download Bluestacks 4 (Offline Installer)
Both 32-bit and 64-bit offline installers are available to download and I recommend you to use the 64-bit version of Bluestacks since many popular android games like PUBG, Call of Duty requires 64-bit in order to run properly.
Installing Bluestacks
- For Online Installer
Just open up the Bluestacks online installer exe file on the Download folder.
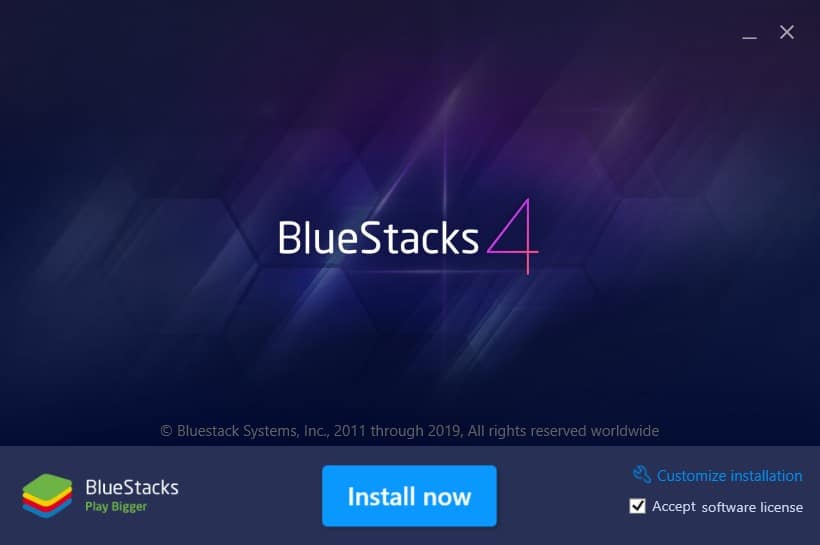
Make sure you have a working internet connection and click the Install button and it will automatically install the Bluestacks program on your PC.
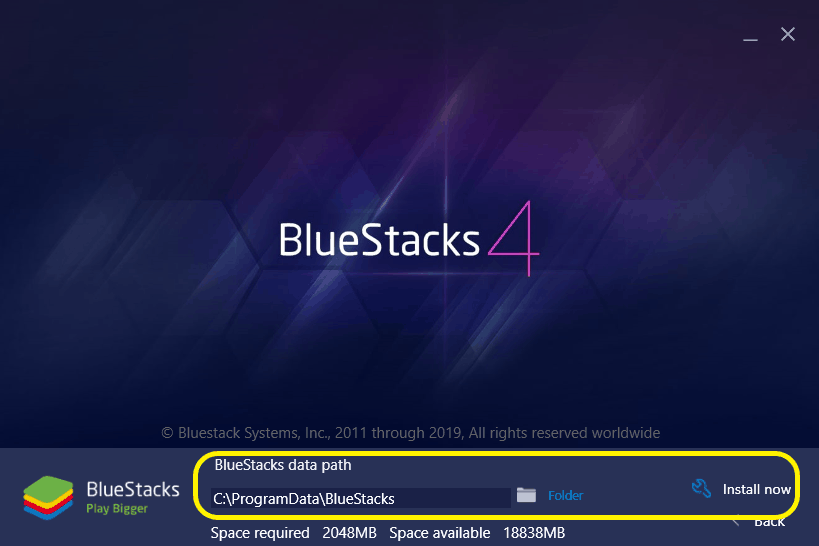
If you want to install Bluestacks on a separate drive then just select this Customize Installation option and choose your desired folder you want to install and click Install now button. It will automatically install all the necessary files to run Bluestacks.
- For Offline Installer
It’s even simpler to install Bluestacks using the offline installer, all you need to do is just open the Bluestacks offline installer exe file and click the Install now button.
And this process is fast and you don’t an internet connection. Once everything is done just click the Launch button.
Setting up Bluestacks
After you successfully installed the Bluestacks program on your computer, just open it from the desktop using the Bluestacks shortcut.
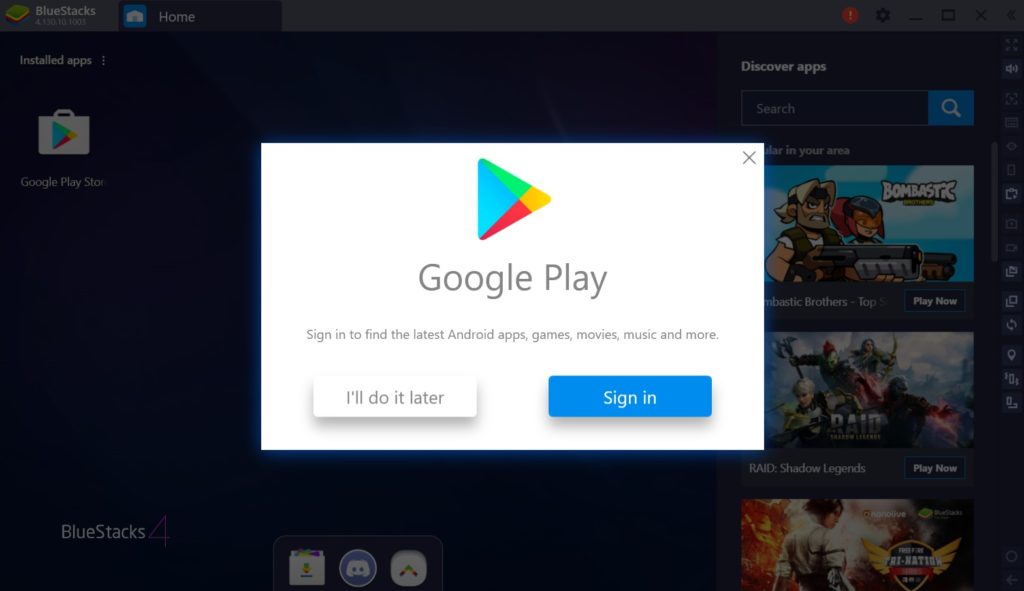
When you open Bluestacks for the first time, it will prompt you the Google sign-in option you can simply do this later and start using the Bluestacks emulator immediately. But I recommend you to sign-in because of most of the apps and games require google account.
Just click sign-in and further you can do the exact same steps like type in your email id and password as you do on your android device.
Finally, you have your powerful virtual Android Device on your PC and from now can play Android games in full resolution and in Ultra graphics settings.
Turn on Virtualization
If your processor supports Hyper-V or Virtualization Technology then you must enable that option to get smoother performance in Bluestacks.
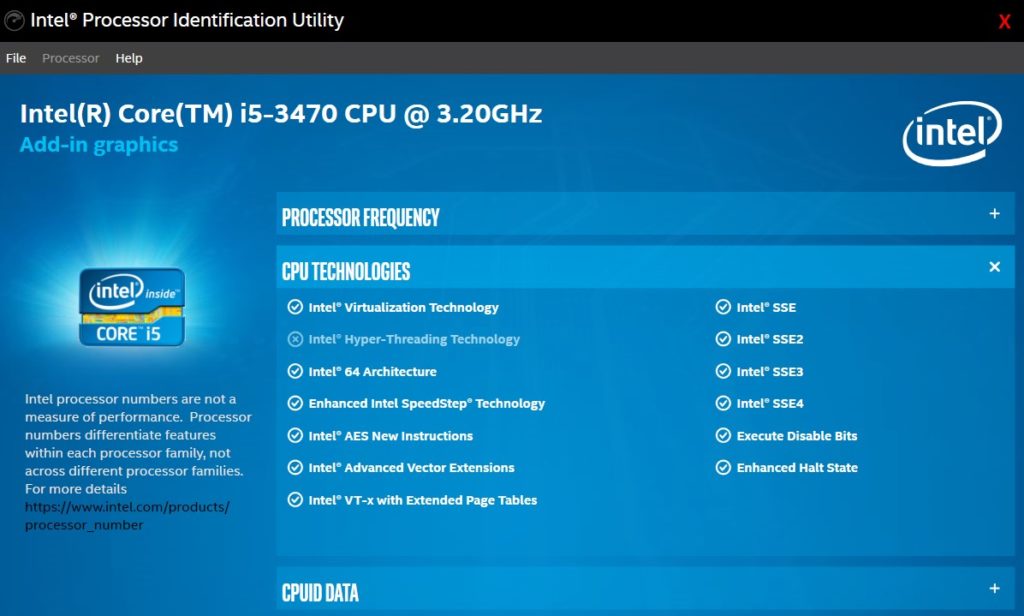
First, you have to check whether your processor supports Virtualization or not, to do that just download the Intel Processor Identification Utility program for Intel users. Then install and run the tool and under CPU Technology you should be able to see the option Intel Virtualization Technology is checked.
Similarly, AMD users can use this AMD-V Detection Utility tool.
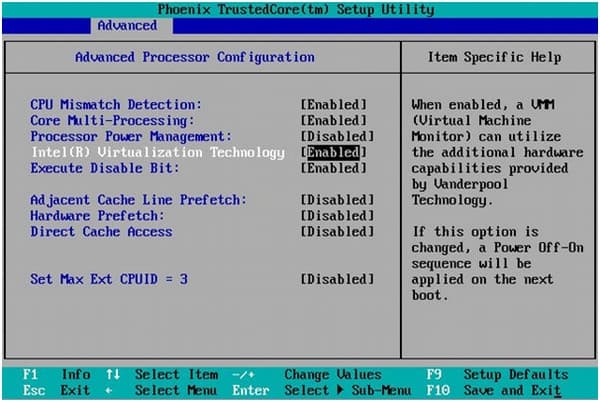
Once you have the right processor that supports Virtualization, then you need to turn on the Virtualization option under UFEI option from the BIOS settings, because by default Intel processor turned this option off.
Once you turn on Virtualization just restart your computer and open Bluestacks and immediately you will feel the difference. Now the animations look smoother and performance is vastly increased.
Bluestacks Gaming
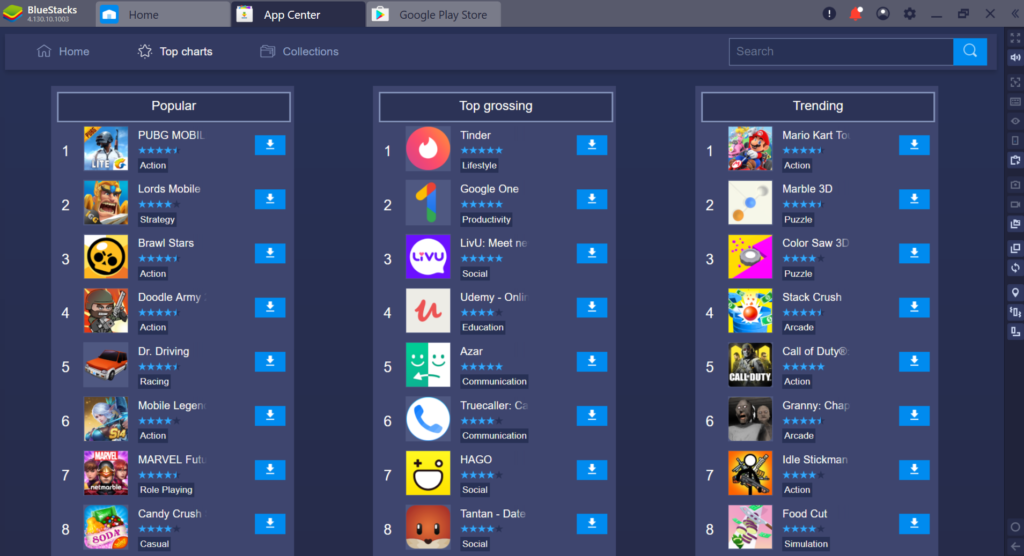
App Center vs Google Play Store
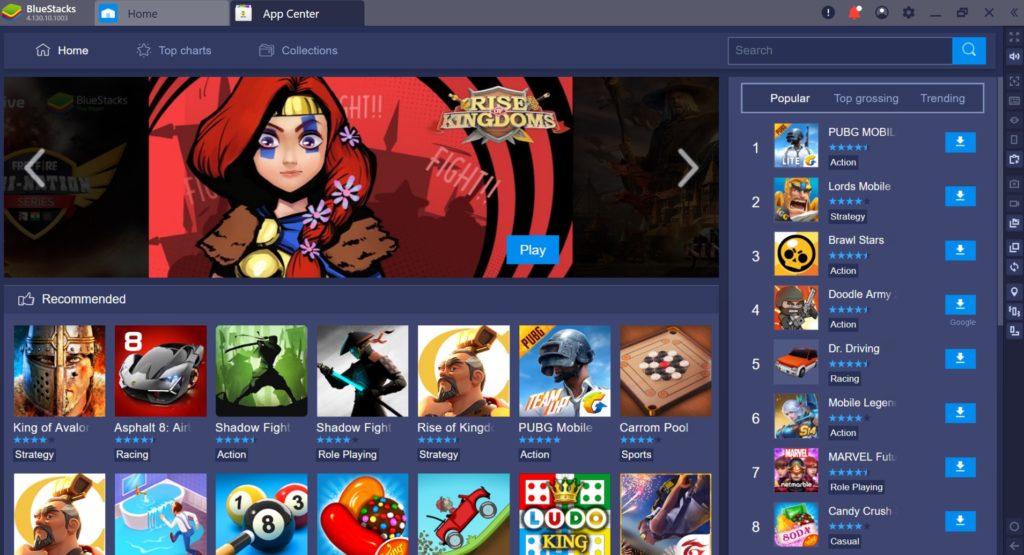
It is basically a Bluestack version of app store and you can find some pretty amazing games and apps that are not available on playstore.
App Center also shows the top trending games like PUBG, Call of Duty, Asphalt 9 etc but once you click that app it will automatically redirect to Google Playstore, from there you can install and play the game.
How to Install Games on Bluestacks
You can simply open the App Center or Google playstore to see the wide range of games available to choose from.
- Open playstore and install any game you want just like you do on your android smartphone.
- For App Center, all you need to do is simply click the download icon next to the game or app you want to install.
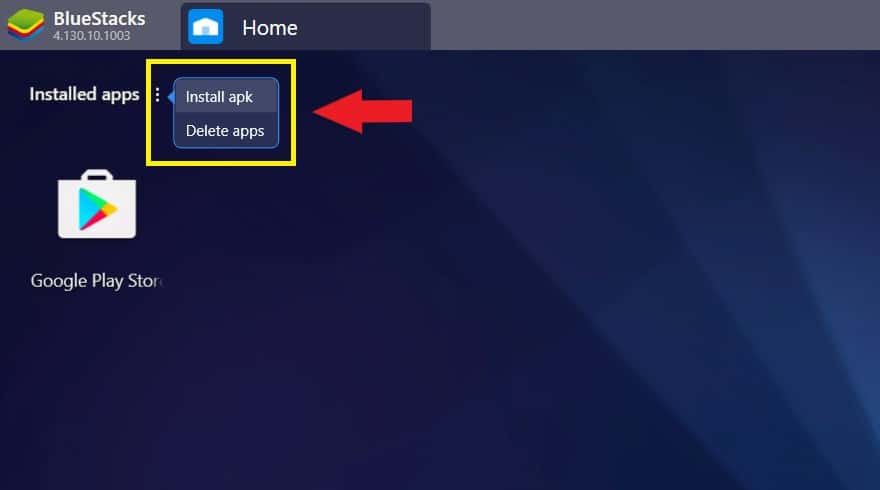
- Or you can install any apk file manually by using the Install apk option near to Installed apps.
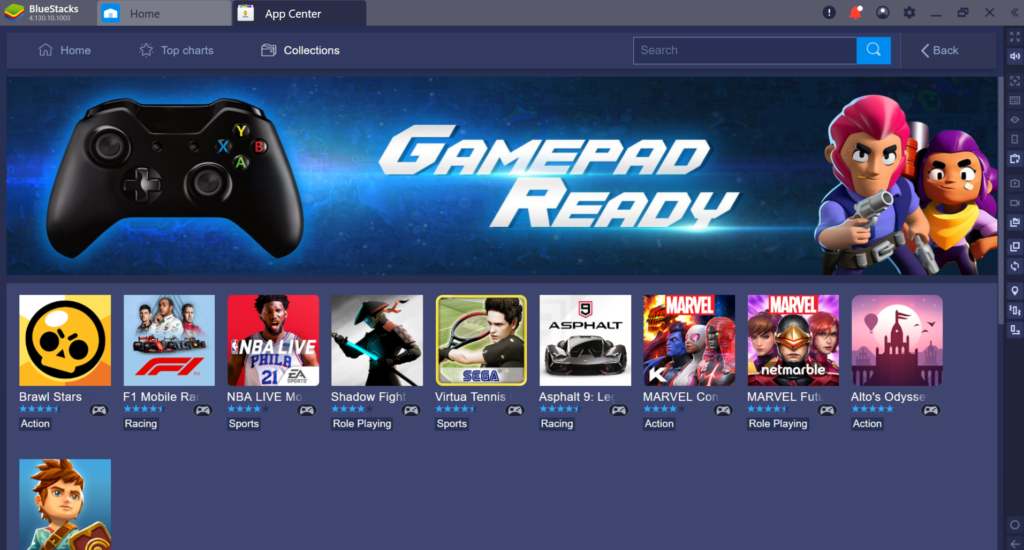
Gamepad Ready Games
These are the list of the games that natively support Gamepad or Xbox controller, without any issues. And Bluestacks developers put great effort in order to make every possible game to support advanced features like this.
By using your controller to play games on your PC, you will be less likely to notice that you’re actually playing android games.
Also Read:
Best Settings for Better Gaming Experience
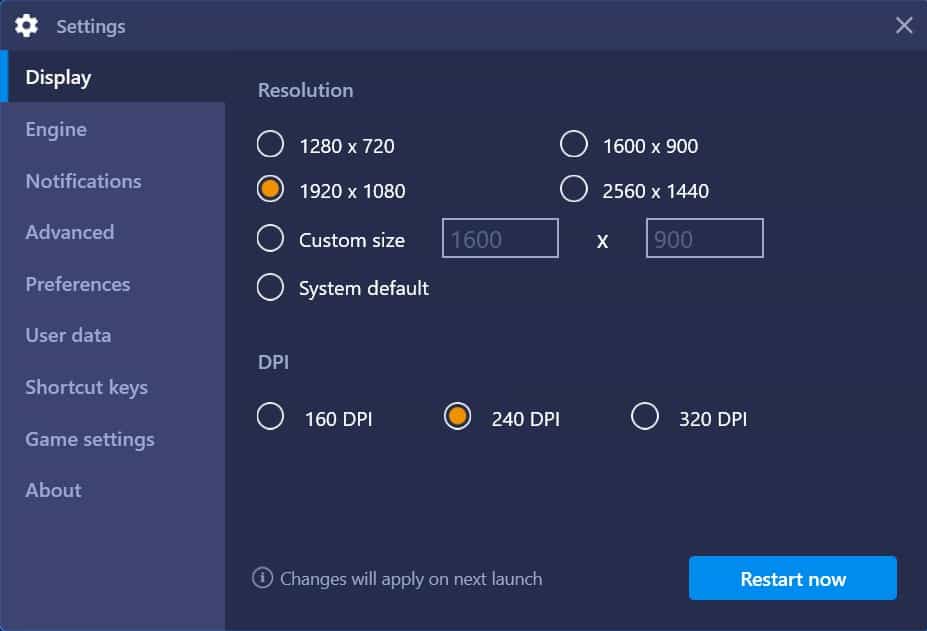
The default Bluestacks settings are dumb and you should change it right away after you installed Bluestacks for the better gaming experience.
- Open Bluestacks and tap the Settings icon on the top right corner and choose Settings.
- On Display settings make sure you checked system default option and 240 DPI.
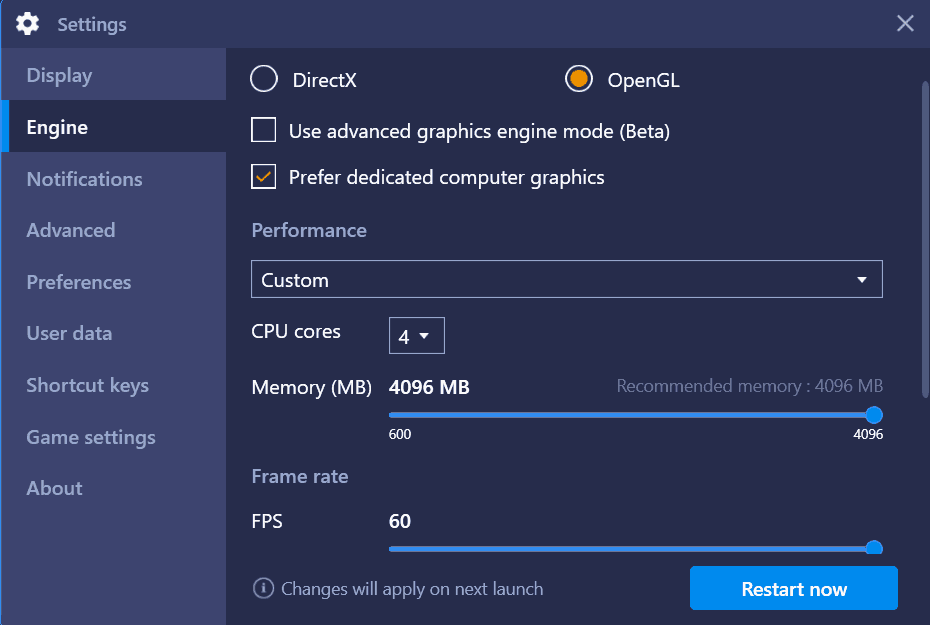
- On Engine settings set the graphics mode to OpenGL, and under performance set the no of cores to 4 and memory to 4GB depending upon your configuration.
- Also, set the FPS to 60 and you can achieve more FPS by enabling High frame rate option.
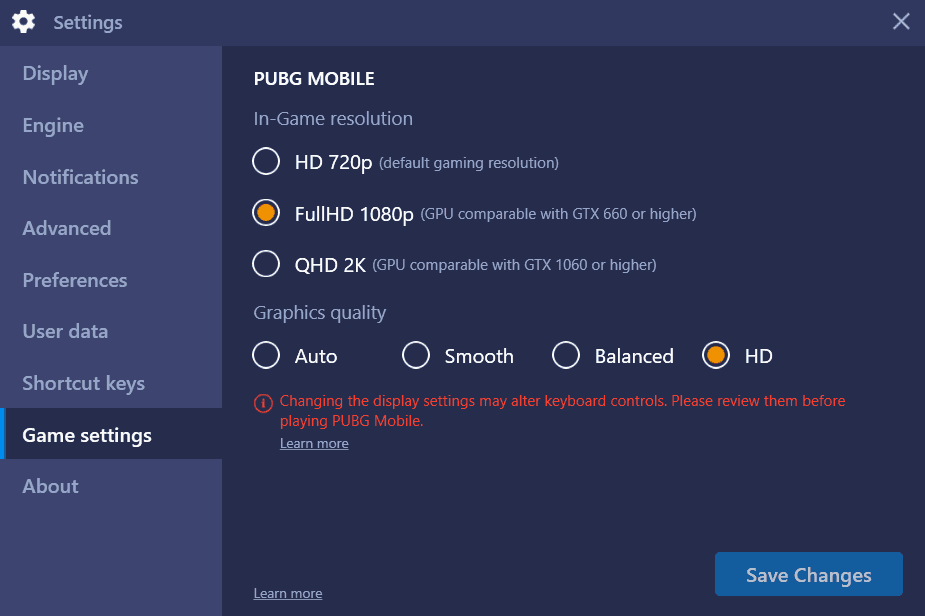
- Finally, under Game settings you can set the In-Game resolution and Graphics quality depending on your graphics card and hit Save Changes.
Backup & Restore
If you want to install a newer operating system on your computer or you just want to change your PC, you can simply move Bluestacks with your installed games and data to another computer without any problem.
Method 1
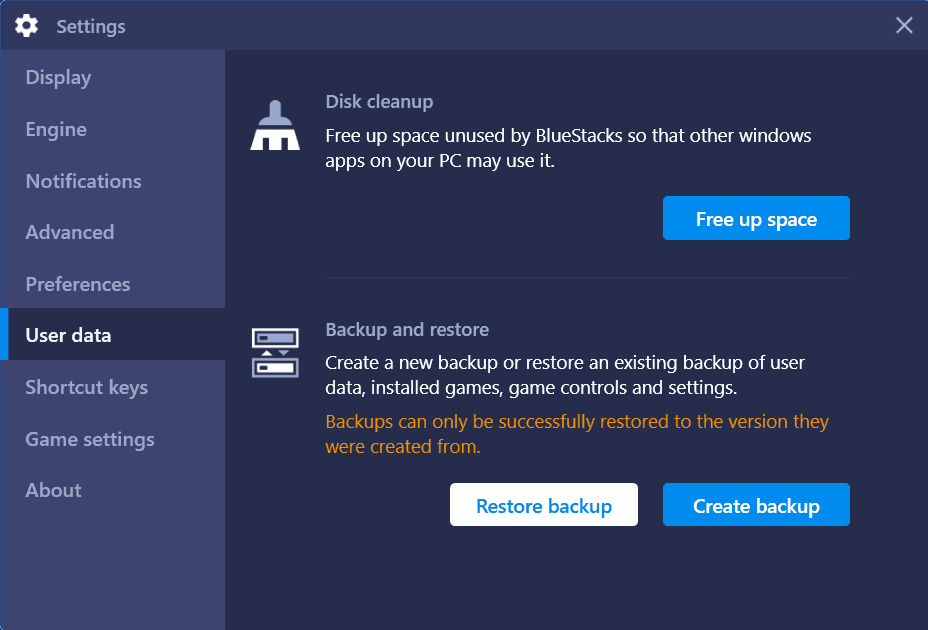
- Open Bluestacks and go to settings.
- And navigate to User data.
- From here you can create a new backup or restore an existing backup of user data, installed games, game controls etc.
Note: Backups can only be successfully restored to the version they were created from by using this method.
Method 2
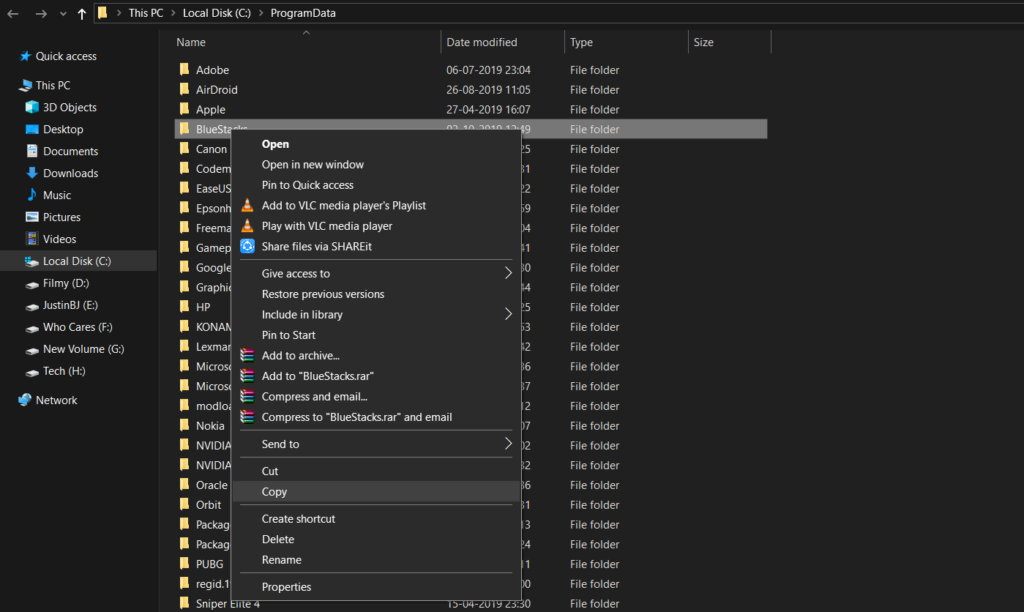
- Open File Explorer and go to Local Disk C -> Program Data (hidden folder).
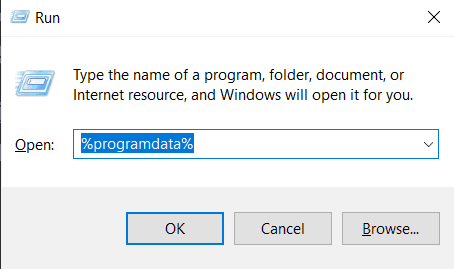
- You can also open by pressing Win + R simultaneously and in the Run command box type in %programdata% and hit enter.
- Once you opened the programdata folder just copy the Bluestacks folder to anywhere you want to save as your backup.
- Now you can keep that backup and uninstall Bluestacks.
- If you want to use those files again then simply paste this copied Bluestacks folder in Program Data after you installed Bluestacks on the new PC.
Final Thoughts
I hope this article will help you to know all about Bluestacks. You can easily Download and Install Bluestacks without any troubles. Play high-quality android games on your PC using your controller or keyboard and mouse.

